
More and more homeowners across the UK are choosing to install roof lanterns and take advantage of the many benefits they offer:
- More natural light.
- Greater energy efficiency.
- Better ventilation.
- Adding a feeling of space to smaller rooms creates a more aesthetically pleasing home.
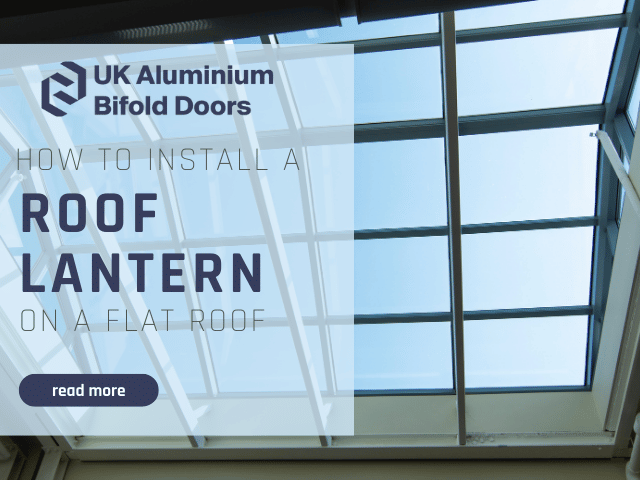
If you’re looking to install roof lanterns on a flat roof, you’re in the right place! This guide will cover how to install a standard four-pane roof lantern configuration. Unless you’re fitting a triple-glazed lantern, this will cover sizes up to 3000mm x 1500mm.
Find more tips and advice on what is a roof lantern and the various styles and types they come in.
Things to Consider Before Installing a Roof Lantern
Before deciding on installing your own roof lantern, you should consider the following:
- Do you have the confidence and experience to DIY, or would you realistically benefit from builder expertise?
- To install a roof lantern, the roof instruction will generally need to be altered to create the opening – this must be able to carry the weight of the new lantern.
- Any roof light and roof lantern must comply with the relevant UK building regulations. If the roof lantern is installed on an existing roof, the installation must be inspected and approved by building control.
- The fire performance will need to be considered if the roof lantern is near a boundary.
If you’re confident that you want to install a roof lantern by yourself, follow the installation method below.
How to Install a Roof Lantern on a Flat Roof: Step-by-Step
Step 1: Gather Up Supplies
Check all parts against inventory before assembling the roof lantern, which will help you identify and familiarise yourself with all the components for your installation.
The number and type of parts vary depending on your unit’s size – all this information should be outlined in the inventory list.
Step 2: Measure the Opening
Before you buy a roof lantern, the first step is to measure the structural opening where you’d like your roof lantern to go. The actual size of the opening should reflect the size of the roof light you ordered.
For example, the opening measures 2,000m x 1,000m for a roof lantern measuring 2,000m x 1,000m. This should measure 70mm in width to match the width of the built-in upstand you’re going to assemble. The height of the upstands kerb should have a minimum height of 70mm. However, this can be increased if necessary.
Step 3: Prepare the Roof
In most cases, you will have installed your roof membrane over the ply deck of a flat roof. If you have done this step already, leave enough extra material around the timber kerb and upstand to weatherproof your roof lantern when fitted. You can fold this material to one side until the roof lantern is installed.
However, we recommended applying the roof membrane after installing the roof lantern to prevent damage and punctures during installation.
Step 4: Assembling the Roof Lantern Frame
Now you’re ready to begin constructing your new roof lantern. For most roof lantern sizes, the built-in insulated upstand will come assembled, but if your roof lantern is larger than 3000mm x 1500mm, you may need to assemble the frame yourself.
Take two corner cleats and slide them into the slots of the frame. Then take the other end of the cleats and insert them into the slots of the matching piece of the frame.
Before sliding the two frames together, ensure the nuts and bolts are in pre-drilled holes in the frame’s corners. Then use the provided screws to securely fasten the frame section through the top of the upstand. Repeat with all corners until the frame is securely fastened together.
Once you’ve secured all four corners through the top of the frame, turn the upstand over and repeat the process for each corner.
Step 5: Connecting the Upstand to the Timber Kerb
The upstand is now ready to be fixed to your timber kerb. Apply a thick bead of professional-quality silicone sealant adhesive around the timber kerb about 20mm from the inner edge.
Then carefully place the assembled upstand onto the kerb, ensuring it sits flush with the inner and outer edges of the kerb. To secure the upstand to the timber kerb, insert the screws into the designated groove on the bottom edge of the upstand, 100mm from each corner.
Pre-drill the holes into the aluminium frame using a standard metal drill head. We recommend 12 screws with a minimum length of 50mm, two at each corner, with an additional screw in the middle of each side.
Step 6: Attaching the Bars to the Upstand
Now you can attach the four hip bars to the upstand. Place the hip into position over the upstand and slide the head of the bolt at each corner into the slot of the hip. Pull the hip body forward while tightening the bolt to keep the internal nut in place while tightening. Repeat for each corner.
When tightening the bolts, ensure the hip body does not touch the timber kerb. To prevent this, you’ll need to cut the slots in the hip bars.
Now it’s time to introduce the ridge bar. There are blocks on either end of the ridge bar that already hold the bolts that will connect to the hip bars. Slot the grooved end of the hip bars over the screws in the ridge edge block. Position the hip bars to connect in line with the centre of the ridge bar. Then repeat for the other end.
Remove the protective film from both sides of the ridge and hip profile. Once these are removed, fit a packer to each corner of the kerb and apply a little silicone to each side of the packer to keep it from sliding side to side.
Step 7: Installing the Glass
The next step is to insert the glass panels of your roof lantern. Before inserting the glass panels, peel back a small tab of the protective glazing film from the ridge and hip bars.
You must take care during this step as these are the heaviest components of your roof lantern. Lift the glass panel and sit it on the inside groove of the packers. Then carefully lower the glass into the frame, ensuring the glass is flush. Repeat for all four panels.
Step 8: Installing the Carriers and Caps
When you’re happy that the glass is positioned correctly, apply a generous amount of silicone sealant into the top and bottom grooves of each hip bar.
Next, run silicone between the panels and frames on either side of the hip and ridge bars. You can use your hands or a rubber mallet to gently tap the hip carriers and top caps onto the hip bars.
Slide the hip carriers up the hip bars so the angled cutouts line up and position directly centre to the ridge bar. Arrange the hip carrier so 100mm protrudes at the top, as you cannot slide the hip caps into position until the ridge carrier and top cap are fitted. Repeat at the other end of the roof lantern.
To install the ridge carrier, run a thick bead of silicone sealant between the glass and ridge bar on both sides. Tap the ridge carrier into place by hand or with your rubber mallet, and check the ends to ensure it is perfectly centred. Then, slide the ridge top cap in from one end.
Just as you did with the hip carriers, you can now slide the top caps into place to meet equally at the top in the centre.
Now you’re ready to attach the four included hip caps to the bottom ends of the hip bars. Using a screw gun set to a low gear, attach the end caps while ensuring not to overtighten the screws. Repeat this for all four corners.
Now install the two ridge end caps. Fill the gap between the hip caps and the end of the ridge cover with silicone sealant and attach the two end caps.
Step 9: Installing the Roof Membrane
The assembly of your roof lantern is almost complete. All that’s left to do is seal the underside of the bottom edge of the glass with silicone sealant. Then, from the inside of the lantern, gently peel off the rest of the glazing film from the hip and ridge bars from where you left excess running to the inside in step 7.
Now you’re ready for the final stage of your roof lantern installation. Weatherproof your upstand with your chosen roof membrane.
Ensure your membrane is tucked under the allocated drip lip below the glass. This is important as it acts as the final weather proofing stage to prevent water from entering the area.
Step 10: Enjoying Your New Roof Lantern
Once correctly installed, your new lantern will give you years of trouble-free pleasure, bringing more light into your home and looking mightily impressive.
Below, the room will enjoy a wealth of natural light. You’ll also benefit from energy efficiency and weatherproofing with low maintenance requirements!
Upscale Your Home With Aluminum Windows and Doors
The benefits of natural light within a home have been an ever-popular solution, and aluminium windows and doors and a roof lantern are an excellent way to let that light in!
More and more homeowners are choosing aluminium bifold doors and take advantage of the energy-efficient and ventilation benefits they offer. They also work wonders to free up space in smaller rooms and create a more aesthetically pleasing home.
With doors like ours, you can achieve just that!
Once installed, follow our tips on maintaining your aluminium doors and windows.
FAQs
Do I need planning permission to install a roof lantern?
Generally, most roof lantern installations in the UK will not require planning permission, provided the following permitted development rules are followed:
- Roof lights and lanterns must be at most 150mm from the existing roof plane.
- Roof lanterns cannot be higher than the highest part of the roof.
- In some situations, side-facing windows need to be obscure-glazed – particularly if the windows overlook adjoining boundaries.
What should the u-value of a roof lantern be?
To ensure building regulations compliance, a roof lantern must have a minimum acceptable thermal performance standard of 2.2 W/m²K.
How long does it take to install a roof lantern?
We recommend setting aside 3-4 hours to install your roof lantern, depending on its size, type of roof lantern, and whether the opening has already been constructed. This process will also need a minimum of two people.